XML
Code
For this example, we’re creating a movie that presents the viewer with a choice: Red Pill or Blue Pill. Depending on the viewer’s choice, the movie shows one of two alternate endings.
To achieve this, we have split the movie into three video segments: the Introduction, the “Red Pill” Ending, and the “Blue Pill” Ending.
We also have two images that are displayed during the choice prompts: the Choice 1 Wait Screen: 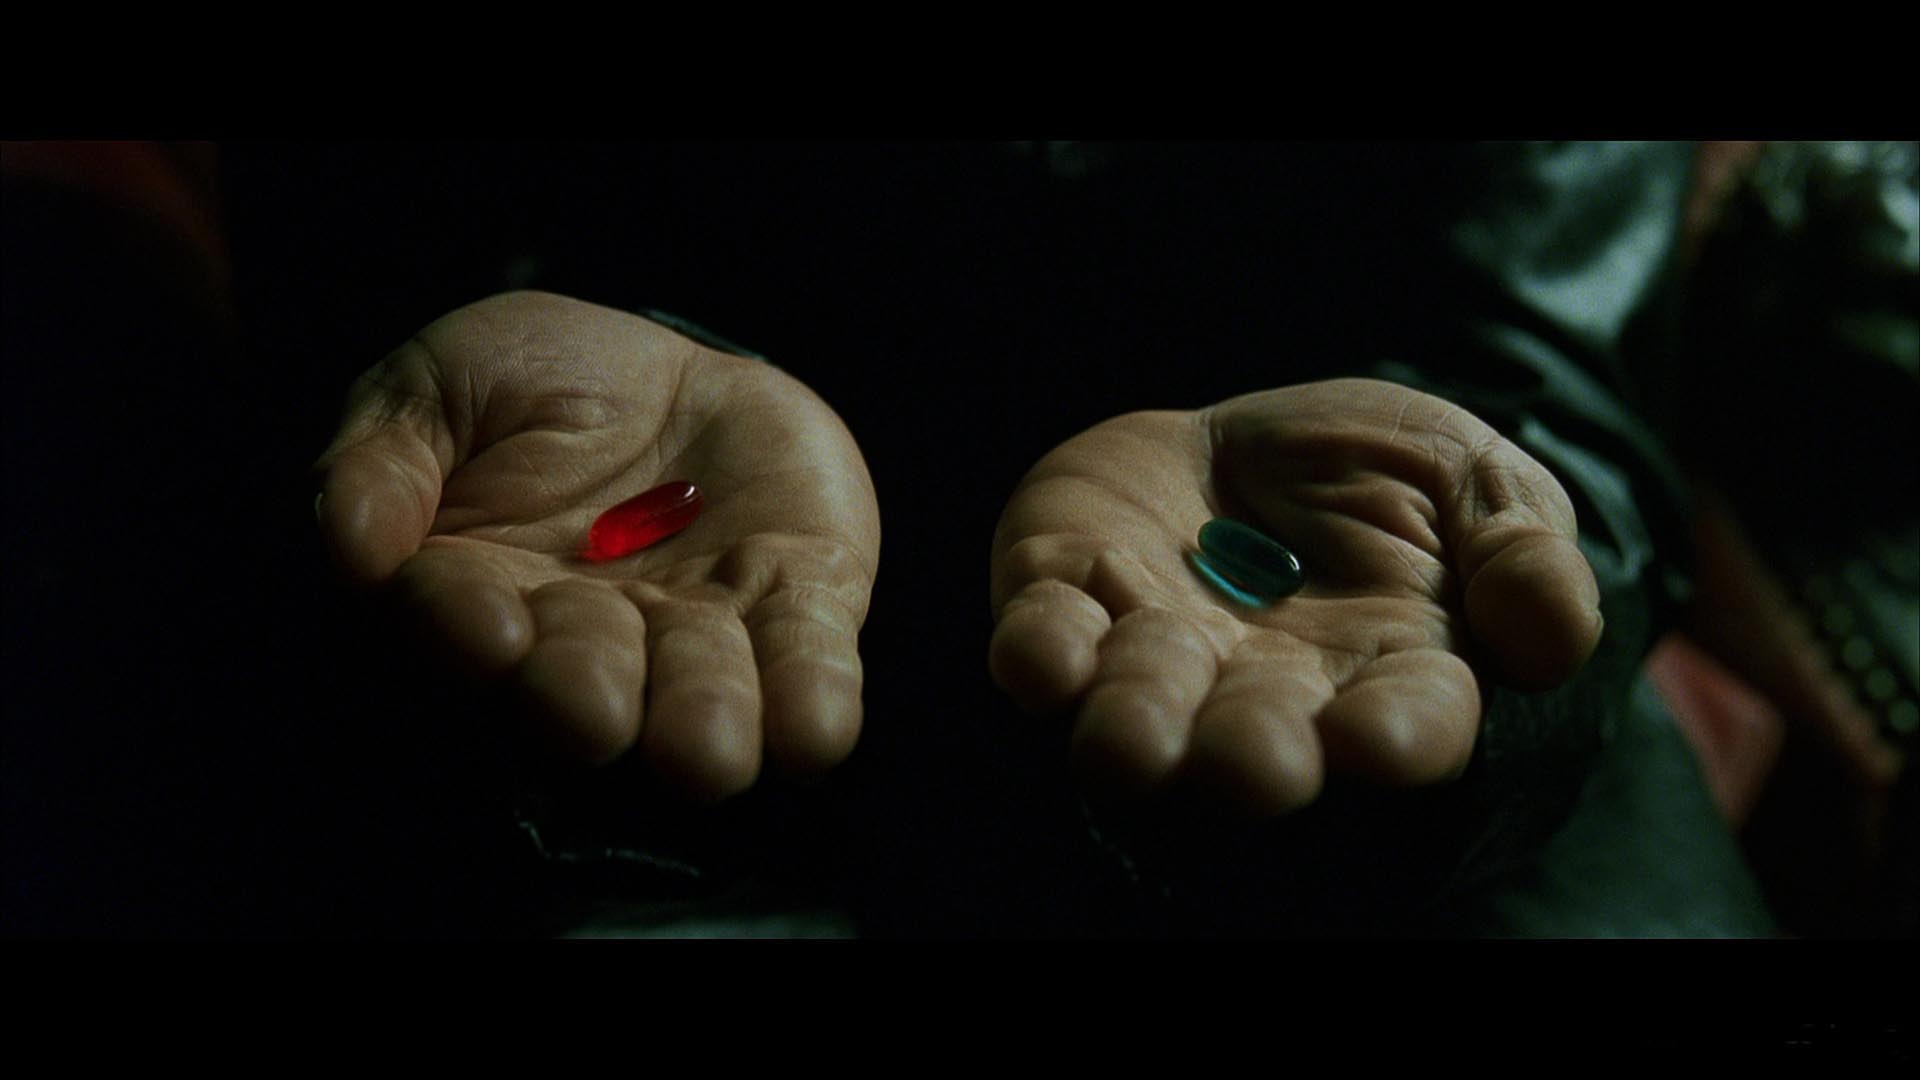
…and the Closing Wait Screen: 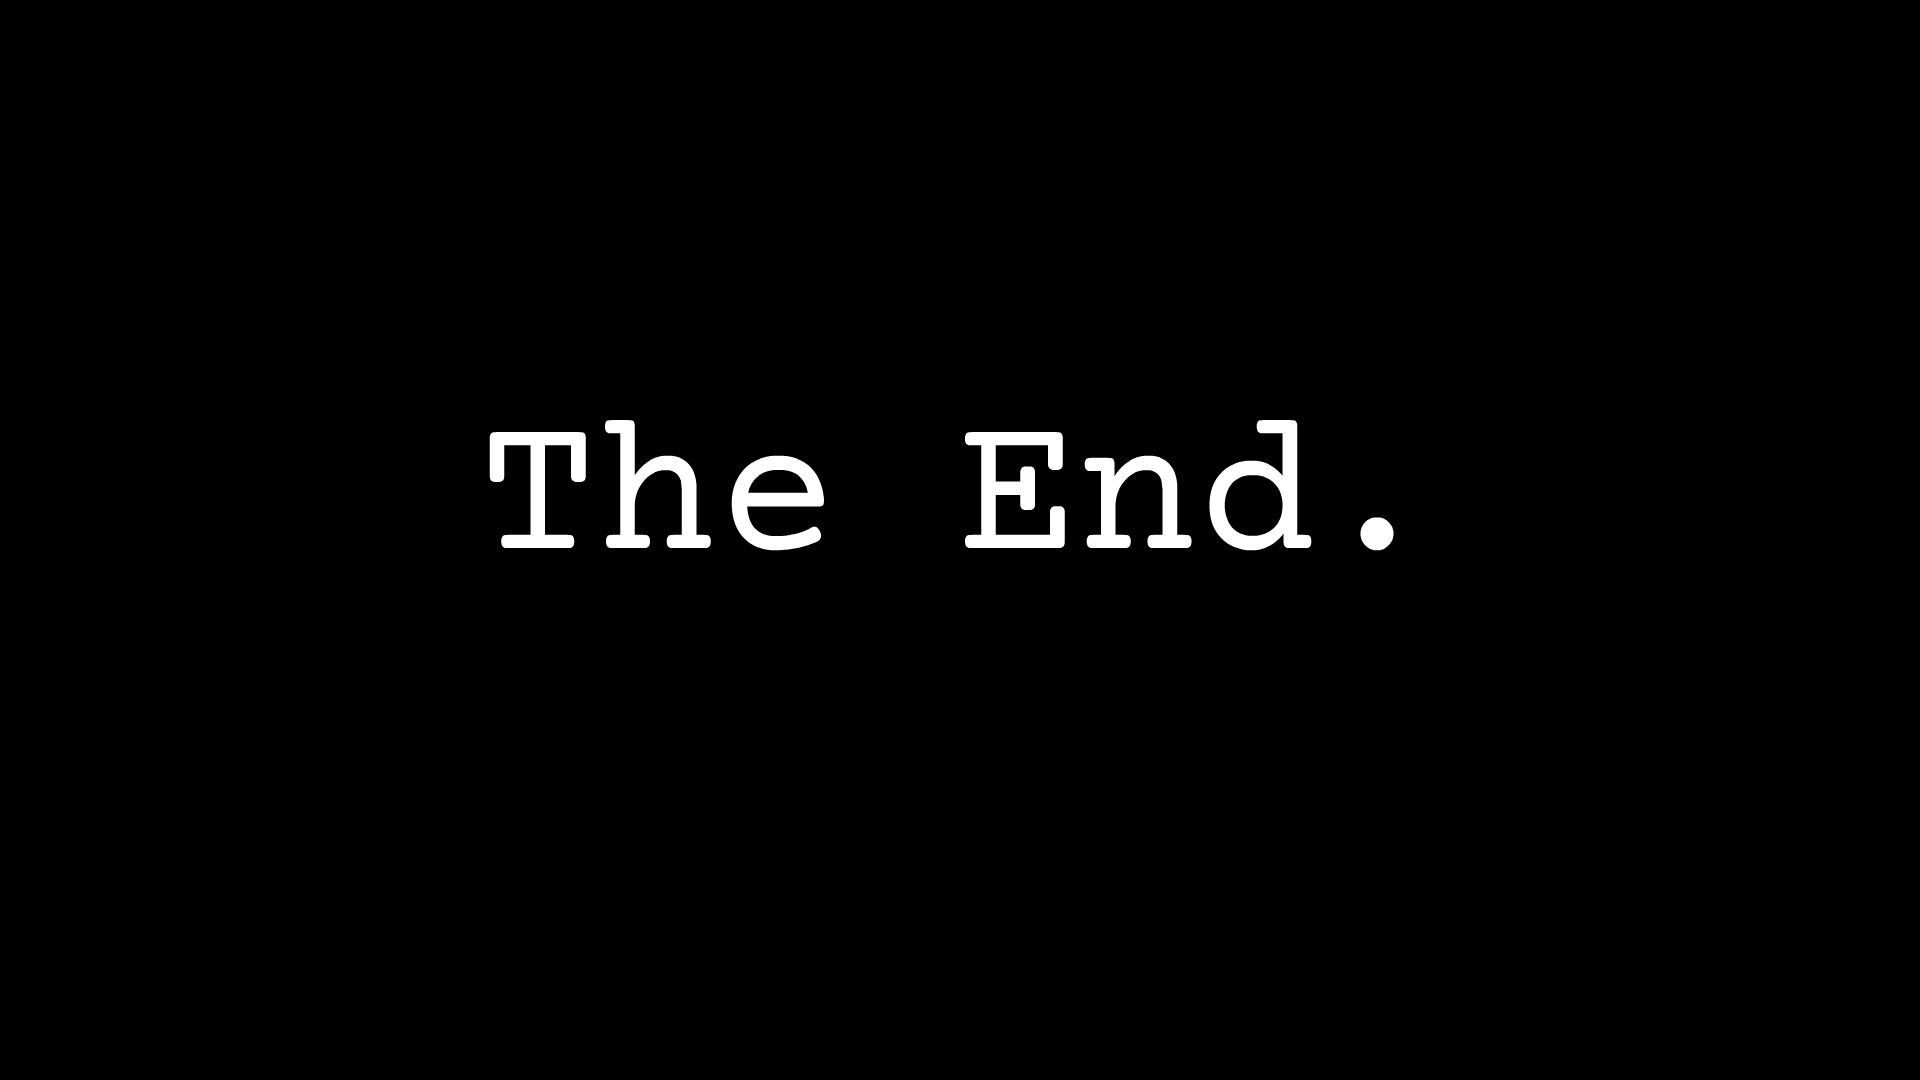
While these could also be implemented as video segments, since there is no motion in them, using images saves on file size and thus download overhead.
Put together, the playback sequence looks like this: Intro → Choice 1 Wait Screen → ( “Red Pill” Ending OR “Blue Pill” Ending ) → Closing Wait Screen.
With RedBlue, you don’t have to write the logic to achieve this playback sequence yourself. You simply use declarative HVML markup to specify the available choices and which files to play for each choice. The player code handles the rest.
<script type="module">
  import RedBlueVideo from './modules/redblue-video-compat.js';
  customElements.define( RedBlueVideo.is, RedBlueVideo );
</script><redblue-video>. HVML can be represented as either XML or JSON-LD. When using the XML serialization, set the boolean hidden attribute to true to prevent the browser from rendering the metadata.<redblue-video>
<hvml xmlns="https://hypervideo.tech/hvml#" hidden="hidden"></hvml>
</redblue-video>video element. (Not to be confused with HTML’s video element—though unless your page is served as XHTML, technically the browser will interpret it as such.) This is the container for all of your video’s metadata.<redblue-video>
<hvml xmlns="https://hypervideo.tech/hvml#" hidden="hidden">
<video></video>
</hvml>
</redblue-video>video, set basic metadata: titlepublished, the date of first public releaseruntime, usually an integer denoting minutes or an ISO 8601 duration, but in this case the string “variable” indicates a branching narrative whose runtime depends on choices madedescription<redblue-video>
<hvml xmlns="https://hypervideo.tech/hvml#" hidden="hidden"></hvml>
<video>
<title>RedBlue Test</title>
<published>2014</published>
<runtime>variable</runtime>
<description>Branching narratives demo</description>
</video>
</hvml>
</redblue-video>video, include a presentation element. This is the container for instructions telling the RedBlue Player how to present a video on playback.<redblue-video>
<hvml xmlns="https://hypervideo.tech/hvml#" hidden="hidden">
<video>
<title>RedBlue Test</title>
<published>2014</published>
<runtime>variable</runtime>
<description>Branching narratives demo</description>
<presentation></presentation>
</video>
</hvml>
</redblue-video>presentation, and for each media file, do this:file element.label attribute to an identifier that is shared between different versions of the same media segment—but is unique amongst different media segments. For instance, for the Introduction file, you might have a WebM and an MP4 version; each of which might have a 1080p and a 720p version. So all four of these file elements could have label="intro", which allows the RedBlue Player to select the most appropriate version depending on the viewer’s browser capabilities and connection speed.xlink:href attribute to the URL of the media file.xml:id attribute to a globally unique identifier, e.g. intro-webm-1080p, so it can be linked to directly.<redblue-video>
<hvml xmlns="https://hypervideo.tech/hvml#" hidden="hidden">
<video>
<title>RedBlue Test</title>
<published>2014</published>
<runtime>variable</runtime>
<description>Branching narratives demo</description>
<presentation>
<file label="intro" xlink:href="media/webm/intro-1080p.webm">
<file>
<file label="choice-1-wait-screen" xlink:href="media/bitmap/choice-1-wait-screen.jpg"><file>
<file label="red-pill-outcome" xlink:href="media/webm/red-pill-outcome-1080p.webm"><file>
<file label="blue-pill-outcome" xlink:href="media/webm/blue-pill-outcome-1080p.webm"><file>
<file label="the-end-wait-screen" xlink:href="media/bitmap/the-end-wait-screen.png"><file>
</presentation>
</video>
</hvml>
</redblue-video>codec element.<redblue-video>
<hvml xmlns="https://hypervideo.tech/hvml#" hidden="hidden">
<video>
<title>RedBlue Test</title>
<published>2014</published>
<runtime>variable</runtime>
<description>Branching narratives demo</description>
<presentation>
<file label="intro" xlink:href="media/webm/intro-1080p.webm">
<!-- video/webm; codecs=vp8,vorbis -->
<container>
<mime>video/webm</mime>
<codec type="video">
<mime>vp8</mime>
</codec>
<codec type="audio">
<mime>vorbis</mime>
</codec>
</container>
<file>
<file label="choice-1-wait-screen" xlink:href="media/bitmap/choice-1-wait-screen.jpg">
<codec>
<mime>image/jpeg</mime>
</codec>
<file>
<file label="red-pill-outcome" xlink:href="media/webm/red-pill-outcome-1080p.webm">
<!-- … -->
<file>
<file label="blue-pill-outcome" xlink:href="media/webm/blue-pill-outcome-1080p.webm">
<!-- … -->
<file>
<file label="the-end-wait-screen" xlink:href="media/bitmap/the-end-wait-screen.png">
<!-- … -->
<file>
</presentation>
</video>
</hvml>
</redblue-video>In HVML, branching narratives are achieved by what is termed a nonlinear playlist. Nonlinear playlists are like regular playlists in that they specify a list of media files to be played back sequentially. But in nonlinear playlists, choice prompts can be queued in addition to media files. When the playhead encounters a choice prompt, the viewer is presented with one or more options that, when selected, redirect the playhead to different parts of the playlist. Each choice prompt can be assigned a wait screen, a background video or image to display while waiting for the viewer’s input. In our example, the Red Pill/Blue Pill choice prompt features a closeup of Morpheus’s hands as its wait screen.
When creating nonlinear playlists, there are three HVML elements to be familiar with.
mediaA media element instructs the RedBlue Player to play a single media file. It can link to a single media file directly, or in can link to a set of media file candidates. When a media file links to a set of media file candidates, the RedBlue Player will select one to play back based on the browser features, device specs, and/or network conditions of the viewer.
The playhead traverses from one media element to the next in top-down source order (linear progression), unless it encounters an instruction that diverts it elsewhere (nonlinear progression).
To make it possible to navigate to a media element nonlinearly, set its xml:id attribute to a globally-unique ID so the playhead can be sent there.
Set the media element’s xlink:href attribute to the appropriate URL.
<media
  xml:id="intro"
  xlink:href="media/webm/intro-1080p.webm"
></media>Set the media element’s xlink:href attribute to an XPointer expression.
If you aren’t familiar with XPointer expressions, they’re like advanced URL hashes. While URL hashes can only refer to one part of a document based on ID or anchor name, XPointer hashes can refer to one or more parts of a document based on arbitrary criteria. To do this, XPointer expressions take XPath selectors as their sole parameter. XPath selectors are similar in concept to CSS selectors, but more expressive. Compare:
https://example.com/#section-two#section-twohttps://example.com/#xpointer(//section[2])section:nth-child(2)https://example.com/#xpointer(/section[2]/p[@class="info"]):root > section:nth-child(2) > p[class="info"]The following specifies that when the playhead reaches this media element, the RedBlue Player should find every file element with a label of “intro” in the current document, and then of those candidates, queue up the best fit according to browser, device, and network conditions. It might choose between different file formats, resolutions, aspect ratios, etc. (Note: In the current beta, only WebM is supported as a file format.)
<media
  xml:id="intro"
  xlink:href="#xpointer(//file[@label='intro'])"
></media>choicePromptA choicePrompt element instructs the RedBlue Player to present the viewer with one or more options to choose from. Under it, you can provide:
name element, instructing the RedBlue Player to render heading text on top of the wait screen;media element, specifying a video or image file to use as the wait screen;choice elements, specifying the options to present to the user.<choicePrompt xml:id="red-pill-or-blue-pill">
<name>What will it be, Neo?</name>
<media
xlink:href="#xpointer(//file[@label='choice-1-wait-screen'])"
></media>
<choice>
<!-- … -->
</choice>
<choice>
<!-- … -->
</choice>
</choicePrompt>choiceA choice element instructs the RedBlue Player to render one of a set of options, usually in the form of a link. choices can be overlaid onto specific regions of the player, making them hotspots. When the viewer selects a choice, an action is performed, typically moving the playhead to another point in the playlist.
Under choice, you can provide:
name element, setting the link text. Link text may be invisble if the choice represents a hotspot;goto element, instructing the RedBlue Player to follow the URL specified in its xlink:href attribute. If the URL resolves to another playlist item, the playhead will be moved there. A goto’s xlink:actuate attribute being set to “onRequest” specifies that the viewer needs to request the URL manually (here, by clicking on the link) before the player will follow the URL.<choice xml:id="red">
<name>Red Pill</name>
<goto
xlink:actuate="onRequest"
xlink:href="#wakes-up-to-reality"
></goto>
</choice>With all of our file elements set up, let’s assemble the nonlinear playlist to put them to use.
presentation, add a playlist element.type attribute to “nonlinear”. This attribute activates RedBlue’s interactive playback mode.<redblue-video>
<hvml xmlns="https://hypervideo.tech/hvml#" hidden="hidden">
<video>
<title>RedBlue Test</title>
<published>2014</published>
<runtime>variable</runtime>
<description>Branching narratives demo</description>
<presentation>
<!-- <file>s -->
<playlist type="nonlinear"></playlist>
</presentation>
</video>
</hvml>
</redblue-video>playlist, add a media element.xml:id attribute to a globally-unique ID so it can be independently referenced.xlink:href attribute to the XPointer expression #xpointer(//file[@label='intro']). This selects every file with a label attribute equal to “intro”.<redblue-video>
<hvml xmlns="https://hypervideo.tech/hvml#" hidden="hidden">
<video>
<title>RedBlue Test</title>
<published>2014</published>
<runtime>variable</runtime>
<description>Branching narratives demo</description>
<presentation>
<!-- <file>s -->
<playlist type="nonlinear">
<media
xml:id="intro"
xlink:href="#xpointer(//file[@label='intro'])"
></media>
</playlist>
</presentation>
</video>
</hvml>
</redblue-video>media, add a goto element. This sets up a playhead redirect.on attribute to durationEnd. This tells the RedBlue Player not to activate the redirect until the parent media element is done playing.xlink:href to the ID selector #red-pill-or-blue-pill. This will point to a choicePrompt element shortly.<redblue-video>
<hvml xmlns="https://hypervideo.tech/hvml#" hidden="hidden">
<video>
<title>RedBlue Test</title>
<published>2014</published>
<runtime>variable</runtime>
<description>Branching narratives demo</description>
<presentation>
<!-- <file>s -->
<playlist type="nonlinear">
<media
xml:id="intro"
xlink:href="#xpointer(//file[@label='intro'])"
>
<goto
on="durationEnd"
xlink:href="#red-pill-or-blue-pill"
></goto>
</media>
</playlist>
</presentation>
</video>
</hvml>
</redblue-video>